
Table of Contents
- Best Concrete Texture Tools for Beginners: What Actually Matters
- Concrete Finishing Tools Every Beginner Needs First
- Concrete Texture Rollers: The Fastest Route to Decorative Patterns
- Concrete Stamps for Beginners: When Stamps Beat Rollers
- How to Texture Concrete: Step-by-Step Timing and Tool Sequence
- Common Beginner Mistakes and How to Avoid Them
- Tool Selection by Project, Skill Level, and Budget
- Frequently Asked Questions
Last Updated: October 12, 2026
Best Concrete Texture Tools for Beginners: What Actually Matters
Walk into any hardware store and you'll find a wall of "concrete texture tools" that mostly sit in a garage after one frustrating weekend. At Something Better Corporation, we've trained thousands of students over two decades, and the pattern is always the same: people buy the decorative tool and skip the finishing tools that make it work.
This guide walks through the best concrete texture tools for beginners, in the order you actually need them, which tool handles which job, when to use a roller instead of a stamp, and the timing window that decides whether your texture sticks or smears.
Here's the short version: a beginner needs a float, an edger, a groover, a screed, and one texture tool. That's it. Everything else is a second-project purchase.
Concrete Finishing Tools Every Beginner Needs First
The tools that matter most prepare the surface before any texture touches it. A screed levels the pour, a float smooths it, an edger rounds the border, and a groover cuts control joints.
Here's the minimum starter set, matched to what each tool does:
Tool |
Job |
When to Use |
Beginner Priority |
|---|---|---|---|
Screed |
Levels fresh concrete |
Immediately after pouring |
Essential |
Magnesium float |
Opens surface, pushes aggregate down |
After screeding |
Essential |
Hand float |
Final smoothing on small areas |
Before texture |
Essential |
Edger |
Rounds slab edges |
While concrete is still plastic |
Essential |
Groover |
Cuts control joints |
While concrete is still plastic |
Essential |
Fresno |
Burnishes large flat areas |
Late-stage smoothing |
Second project |
Darby |
Levels before floating |
On large slabs |
Second project |
The magnesium float is the workhorse: it opens the surface, pushes aggregate down, and creates a uniform base for texture. A hand float does the same in tight spaces.
Floats, Trowels, and Fresnos for Smoothing
Floats come in three materials, and the choice matters more than beginners expect:
- Magnesium floats open the surface and are the standard first pass
- Wood floats create a rougher, grippier finish that holds texture well
- Steel trowels burnish the surface smooth and shiny, which is usually the wrong base for texture
A Fresno is a large trowel on a long handle used to smooth big flat areas late in finishing. It's powerful but unforgiving: overwork the surface and you seal it too tight for your texture tool to leave a clean impression. A Darby is a long, flat leveling tool used before floating to fix high and low spots.
Edgers, Groovers, and Jointers for Clean Edges
An edger rounds the sharp edge of a slab so it doesn't chip. A groover cuts a control joint so the concrete cracks along a line you chose instead of one it chose. A jointer is the same tool by another name. Run both while the concrete is still plastic, firm enough to hold shape but soft enough to accept the tool.
Concrete Texture Rollers: The Fastest Route to Decorative Patterns
Concrete texture rollers are the fastest way for a beginner to add a decorative pattern.
That speed is the point. Stamps require placing, tamping, and lifting dozens of individual pieces. A roller does the same visual job in a fraction of the time, which matters when you're racing a concrete set.
Rollers work best for repeating patterns: slate, brick, wood grain, and natural stone. They struggle with irregular, one-off designs where every impression must differ.
Concrete Stamps for Beginners: When Stamps Beat Rollers
Concrete stamps for beginners make sense when you need irregular, non-repeating patterns, or want to work one section at a time without committing to a full-surface roll. A stamp is a rigid or flexible mold pressed into the concrete to leave one impression.
Stamps beat rollers in three situations:
- Ashlar and random stone patterns where every piece should look different
- Tight or oddly shaped areas where a roller can't fit or turn
- Feature work like a border, medallion, or accent band
For everything else, a roller is faster and easier to control.
Rigid vs. Flexible Stamps: Which a Beginner Should Buy
Stamps come in two formats, and the format decides how forgiving the tool is:
- Rigid stamps are thick, hard molds, often re-pourable polyurethane. They hold crisp detail and last for years, but they don't bend, so they can't follow a curved edge or crowned slab. They also punish bad timing: too soft and the stamp sinks; too firm and it leaves a shallow, ghosted impression.
- Flexible stamps are thinner and bend to the surface. They're easier to place on uneven ground, curved walkways, and sloped patios, and release more cleanly when the concrete is slightly firm. The trade-off is shallower detail and faster wear.
For a first stamp project, a flexible stamp is the safer purchase. It forgives the timing errors that a rigid mold turns into permanent defects.
Tamping: The Step Beginners Skip
Placing a stamp is only half the job. The other half is tamping, striking the back of the stamp with a tamping tool or mallet so the pattern presses evenly into the concrete. Skip it and the stamp only bites on one edge, reading as a smeared, half-formed impression. Beginners often press with body weight instead, which produces uneven depth.
Release Agents and Stamp Placement Order
Two details separate a clean stamp job from a muddy one:
- Release agent. Keeps the stamp from sticking. Powdered release is beginner-friendly because you can see coverage; liquid release is faster but easier to over-apply. Without release, the stamp lifts wet concrete and tears the pattern.
- Placement order. Work from the far edge of the slab toward yourself, overlapping each stamp by one pattern repeat. Overlap hides the seams; edge-to-edge placement leaves visible lines.
Texture Skins, Mats, and Stamp Molds Compared
Beginners often confuse three related tools:
- Texture skins are thin, flexible sheets pressed onto the surface to transfer a pattern. Best for large, seamless areas.
- Texture mats are thicker and more rigid, for deeper impressions and heavier patterns.
- Stamp molds are rigid forms, often re-pourable, for repeated identical impressions or casting separate pieces.
Skins cover ground fast but wear faster. Stamp molds last longest and are the better investment if you'll repeat the same pattern across multiple jobs.
How to Texture Concrete: Step-by-Step Timing and Tool Sequence
Texture concrete by preparing the surface with a screed and float, edging and grooving while the concrete is plastic, waiting for the surface to firm up, then rolling or stamping in a single continuous pass.
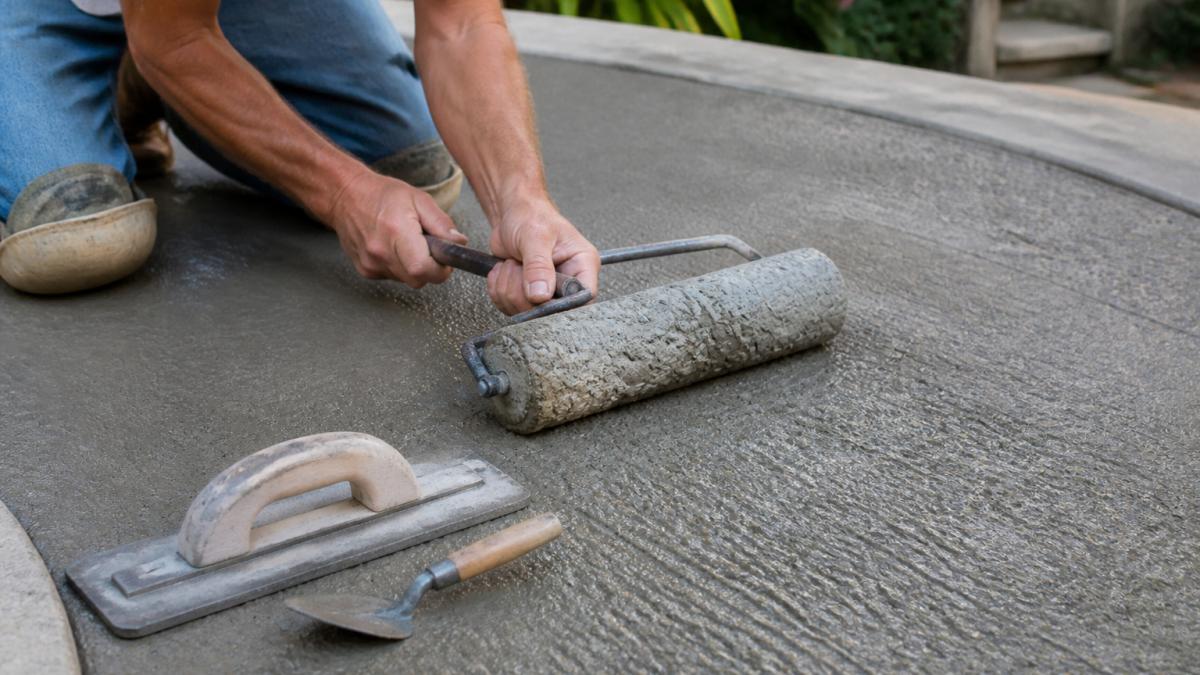
Here's the sequence, with the timing that matters:
- Pour and screed the concrete to level. Time: 5-15 minutes.
- Float with a magnesium float to open the surface. Time: 10-20 minutes after screeding.
- Edge and groove while the concrete is still plastic. Time: 15-30 minutes after floating.
- Wait for the surface to firm up. Press a finger in; it should hold a shallow impression without wet concrete sticking. Time: 15-45 minutes depending on temperature and mix.
- Roll or stamp the pattern in one continuous pass. Time: 5-20 minutes.
- Clean the tool immediately with water before residue sets.
Step four is where beginners lose projects: too early and the pattern slumps, too late and the impression is shallow. Test on a scrap area first.
Common Beginner Mistakes and How to Avoid Them
Most beginner failures trace back to a handful of recognizable problems. The trick is knowing what each looks like on the slab, what caused it, and what to do differently next time.
Texture Applied at the Wrong Time
This is the most common beginner failure, and it shows up two ways:
- Too early (concrete too wet). The pattern slumps, edges round over, and the impression fills back in within minutes. Stamps sink and stick; rollers smear instead of printing.
- Too late (concrete too firm). The impression is shallow and ghosted. Edgers and groovers drag and tear instead of cutting. Stamps leave only a faint outline.
The fix is a finger test, not a clock. Press a finger into the surface near the slab edge. The concrete is ready when the finger leaves a shallow impression and no wet concrete sticks. If wet paste comes up, wait. If your finger barely marks the surface, you're late.
Sticking Stamps and Torn Patterns
A stamp that sticks and lifts wet concrete is almost always one of three things: no release agent, too little release agent, or concrete that's still too wet. Powdered release applied with a brush is the beginner-friendly fix because you can see coverage. If a stamp does stick, don't yank it, lift slowly and straight up, then re-tamp before placing the next stamp.
Uneven Impressions and Visible Seams
Uneven depth usually means the stamp wasn't tamped evenly, or the concrete firmed up between the first and last stamp. Work in small sections and tamp each stamp in a grid before moving on. Visible seams come from placing stamps edge-to-edge instead of overlapping by one pattern repeat.
Damaged Edges and Rounded Borders
A chipped or crumbly edge usually means the edger ran too late, after the concrete set past its plastic window, the tool drags instead of cutting and the edge tears. Run the edger while the concrete still holds shape but accepts the tool cleanly, and test a small corner first. If the edge slumps, the concrete was too wet, wait a few minutes and try again.
Overworked Surfaces That Won't Take Texture
A steel trowel or Fresno used too aggressively burnishes the surface to a tight, shiny finish that won't accept a stamp or roller impression cleanly. If you're planning to texture, stop at the float stage and save the steel trowel and Fresno for surfaces you intend to leave smooth.
Skipped Cleanup and Ruined Tools
Concrete sets fast, and residue left on a roller, stamp, or float is permanent. Rinse every tool with water immediately after use, before the residue hardens. Clean and dry stamps and skins before storage, storing them wet encourages mold growth and shortens their life.
The Mistake Nobody Warns You About
Buying too many tools at once. A beginner with five texture tools and no float produces worse work than one with a single roller and a good float. Buy the base finishing tools first, add one texture tool, and finish a project before expanding the kit.
Tool Selection by Project, Skill Level, and Budget
Match the tool to the project, not the other way around:
Project |
Skill Level |
Core Tools |
Optional Add-Ons |
|---|---|---|---|
Small patio |
Beginner |
Screed, float, edger, roller |
Texture skin |
Walkway |
Beginner |
Screed, float, edger, groover, roller |
Texture mat |
Driveway |
Intermediate |
Screed, float, Fresno, edger, groover, roller |
Stamp molds |
Feature wall |
Intermediate |
Float, trowel, texture skin |
Stamp molds |
Countertop |
Advanced |
Trowel, Fresno, texture skin, molds |
Re-pourable molds |
For budget, buy the base finishing tools first, then one texture tool. Rent specialized tools like a Fresno until you're regularly working on larger slabs, rent anything you'll use fewer than three times a year.
Something Better Corporation offers training from beginner through master level, and free job support for customers, so you're not guessing at the sequence on a live pour.
Frequently Asked Questions
What tools do beginners need to texture concrete?
Start with a magnesium float for initial smoothing, a concrete edger for clean borders, and a groover for control joints. For the texture itself, a concrete texture roller is the easiest entry point because it covers large areas quickly with consistent pressure. Add a texture skin or stamp mat for smaller decorative sections and a Fresno for final smoothing. These concrete texture tools cover most patio, walkway, and driveway projects without a large upfront spend. Something Better Corporation also offers training if you want to charge clients later.
Are concrete texture rollers easier to use than stamps?
For beginners, yes. A texture roller applies pattern across a slab in long, even passes, so you cover more area in less time and with less risk of misaligned impressions. Stamps require careful placement, consistent downward pressure, and a joint layout plan, which takes practice. Rollers still demand correct concrete firmness and timing, but the learning curve is shorter. Many finishers start with rollers and add concrete stamps for beginners once they are comfortable with the timing window.
Can beginners use concrete stamps without prior experience?
Yes, provided you practice on a small test slab first. Stamps work best when the concrete has firmed enough to hold an impression but still accepts texture, roughly a 15 to 45 minute window depending on mix, temperature, and wind. Use release agent, plan your joint layout before you start, and work in a sequence that lets you reach every section without stepping on fresh impressions. Something Better Corporation's molds are cast from real stone and wood, which helps beginners get natural-looking texture on the first try.
When should you texture concrete after pouring?
Texture while the surface is firm enough to hold a pattern but still workable. In practice that means waiting until surface water has sheared off and a thumb pressed into the slab leaves a shallow dent, not a wet mark. On a typical pour that falls in the 15 to 45 minute window after finishing, but heat, wind, and mix design shift that timing. Test on a corner first. If the impression slumps or fills with bleed water, wait a few minutes and test again.
Concrete texture work rewards preparation over equipment. Buy the finishing tools first, practice the timing on a test slab, and add decorative tools as your skill grows. Something Better Corporation makes this easier with texture rollers, stamps, and molds cast from real stone and wood, plus hands-on training and free job support so beginners can deliver professional-grade finishes. Get started with Something Better Corporation and turn your first pour into work you're proud to show.